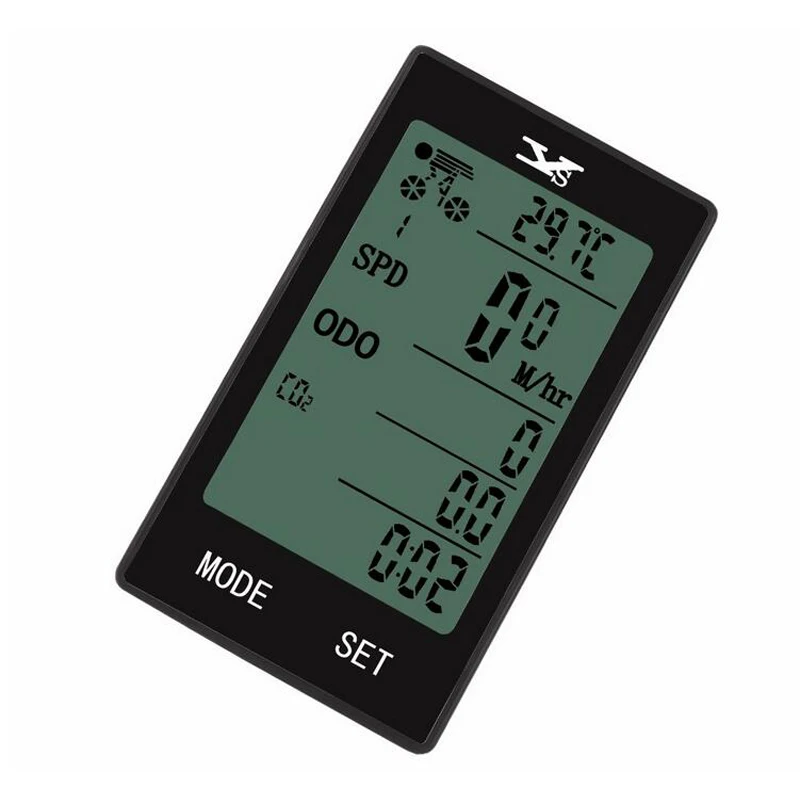
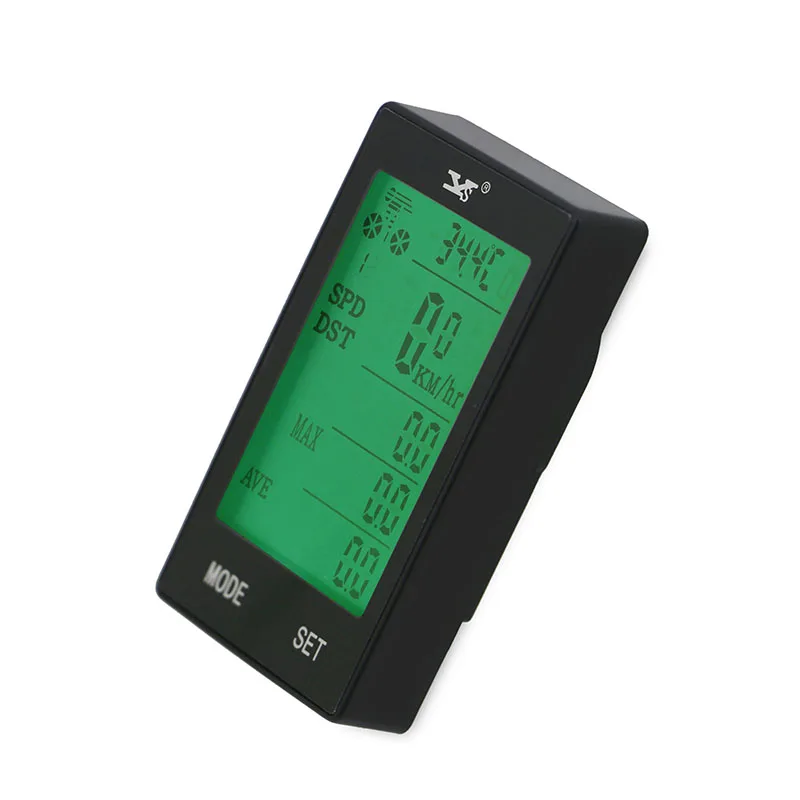
Multifunction Waterproof Auto Bike Computer light mode Wireless Bicycle Computer Cycling Speedometer Odometer

Bike Computer
Instruction book
(Read the instruction carefully before using. Please peel off the protective film on the surface, the original battery can be reinstalled before using)
R= Right button
L= Left button


Function Description
Data Storage (digital data won’t lose during the power off or battery replacement)
Currently Speed (SPD)
Total Riding Distance (ODO)
One Pass Riding Distance (DST)
Maximum Riding Speed (MAX)
Average Speed (AVE)
Riding Time (TM)
Time Display (12 Hr/24 Hr) Date/Month/Year
LED Light Feature ( Press both “L” and “R” button to switch to steady backlight; Press both “L” and “R” button again to turn off)Carbon Dioxide Emissions
Calories Consumption (CAL)
Temperature Display
Low Power Warning(2.5v)
Power Saving Function
Maintenance Reminders
Unit Setting KM/hr., M/hr.
Initial Value of Total Distance set Up
Available for Two Bicycles
Auto off
Battery Installation
Open the battery lid of the bike computer, then, put a 3v CR2405 into the battery jar. Put the anode up, screw the battery lid clockwise. (The wireless launcher also installs a CR2450 battery)
Bike computer base Installation
Attach the bike computer base on to the handlebar by cable tie, if you want to install it on the vertical handle bar , open 4 screws of the bike computer base, rotate the soft gasket to 90 degree and make it touching the handlebar; then tighten the screws.
Computer Installation
The bike computer can completely slide down to the chute of bike computer base, which has card slots to prevent bike computer pulling out accidently. Check the installation: twirl front wheel, check the whether the number on bike computer changes. If not, adjust the position of magnet and launcher appropriately then try again.

Sensor and Magnet Installation
Screw the magnet on spoke. Then use zip tires to fix the sensor on the front fork by the same side of spoke magnet. Then, adjust the distance of magnet and sensor, and keep its relative position in 3mm (the smaller the batter, in the basic of not touching each other). The spoke magnet can work effectively while mounted against both sides of sensor; but not works when it was attached against the middle of sensor.

Setting Step
- Power on – Setting length unit, the default unit is Kilometer. When the mileage unit flashing, it means be provided; press button(R) to choose the length unit, and press button (L) to confirm. ( 1 mile = 1.609 kilometer)
- Wheel circumference 1 set up – the Default value is 2060mm (it means the circumference of wheel), which shows on the middle of the screen. The flashing “0” on the top right means wait to be set up; there is a number “1” on the top left of screen, which means the first circumference you set. You are able to set two values for wheel circumference, in order to use this computer on different bicycles. The setting order is from right to left, press button(R) to change the number and press (L) to confirm. (check the Tire Specification and Test Methods below to find out the right wheel circumference of your bike)
- Press button (L) for 6 secs to change different wheel. Wheel circumference 2 set up – the Default value is 1860mm, follow the second step to set up.
- Body weight set up – the default value is 65kg, shows as “K” and “065”. Firstly, confirm measure unit as “K” flashing (K=kilometer; L=LB). Then, set up the weight, the setting order is from right to left, press button(R) to change the number and press button (L) to confirm. (65kg=143lb)
- Mileage Maintenance 1 – the Default value is 0200. The setting order is from right to left, press button(R) to change the number and press button (L) to confirm.
- Mileage Maintenance 2 – the Default value is 0800. The setting order is from right to left, press button(R) to change the number and press button (L) to confirm.
- Fuel consumption setting – fuel consumption per kilometer. The setting order is from right to left, press button(R) to change the number and press button (L) to confirm.
Since now, you have completed the initial setting of bike computer, and it can be used during your cycling. The wheel circumference 1 is the default value, which is set in step 2 and 6; and it has the number “1” on the top left for distinguishing.
*Tips: The above values can be reset by press both “M” and “S” buttons for 6s.
Wheel Size and Circumference Chart
Enter circumference range: 0mm-9999mm, the Tire circumference can be measured as following way: firstly, turn the tire air faucet down to the ground, mark the corresponding ground. Next, push the bicycle within a straight line and make the wheel spin a round, when the tire air faucet turn down to the ground, mark the second sign. Then, measure the distance between two signs, which is exactly the wheel circumference. If the measured value is 1.615m, you should input the number as 1615.
| Wheel Size | Circumference | Wheel Size | Circumference |
| 700c×38mm | 2180 | 26’’ ×2.25’’ | 2115 |
| 700c×35mm | 2168 | 26’’ ×2.1’’ | 2095 |
| 700c×32mm | 2155 | 26’’ ×2.0’’ | 2074 |
| 700c×30mm | 2145 | 26’’ ×1.9’’/1.95’’ | 2055 |
| 700c×28mm | 2136 | 26’’ ×1.75’’ | 2035 |
| 700c×25mm | 2124 | 26’’ ×1.5’’ | 1985 |
| 700c×23mm | 2105 | 26’’ ×1.25’’ | 1953 |
| 700c×20mm | 2074 | 26’’ ×1.0’’ | 1913 |
| 700c Tubulari | 2130 | 24’’ ×1.9’’/1.95’’ | 1916 |
| 650c×23mm | 1990 | 20’’ ×1-1/4’’ | 1618 |
| 650c×20mm | 1945 | 16’’ ×2.0’’ | 1253 |
| 27’’ ×1-1/4’’ | 2161 | 16’’ ×1.95’’ | 1257 |
| 27.5’’ ×2.0 | 2155 | 16’’ ×1.5’’ | 1206 |
| 26’’ ×2.3’’ | 2135 |
Display Page
There are three display pages: Total Riding Distance (ODO)– One Way (CAL) – One Way (MAX), you can press button(R) to switch these three pages.
Total Distance, Fuel Consumption Rate, Time Setting
Under the total mileage mode: press button(L), mileage – CO2 – Clock symbol will flash successively. You can press button(R) 3s to get into the total distance setting, when the total distance (ODO)symbol flashing. According to your needs entering values, the setting order is from right to left, press button(R) to change the number and press button(L) to confirm.
When CO2 flashing, you can press button(R) 3s to reset up the fuel consumption rate; you can press button(R) to change the number and press button(L) to confirm. This value is the fuel consumption of each KM. During your cycling, the value show on the bike computer is CO2 production value according to the fuel consumption, the measure unit is KG. For example, the initial default value is 0.19L/KM, which means, during the 1KM cycling there are 0.257KG CO2 produced. The CO2 value is corresponded to the one-way mileage. So, it will be cleared, when the one-way mileage clear.
The clock symbol flashing, you can set up time by pressing button(R) for 3s. You should set Year/Month/Day first; the setting order is from right to left, press button(R) to change the number and press button(L) to confirm. Then, set time in the same way.
One-pass, Average Speed, Max-speed, Cycling Time, Calories Cleared
Under the one-way mode, press button(R) for 3s to reset one-way, average speed, max-speed, cycling time and calories.
One-pass: one-pass riding distance, the minimum number is 0.1Km(M), range at 0.0-99.9Km(M)
Max-speed: the maximum speed of one-pass riding, range at 0.0-99.9Km(M)/h
Average Speed: the average speed of one pass riding, range at 0.0-99.9 Km(M)/h
Calories: calories consumed during the single way cycling, range at0.0-99999.0.
Cycling time: the time spent on one pass riding
Additional Feature
Real-speed: current riding speed, the accuracy is 0.1 Km(M)/h, range at 0.0-99.9 Km(M)/h.
Temperature: the unit of measurement is Celsius. Range at -10~50 degrees
Light: during the night at 17:00-07:00, the computer screen will turn light for 4s if you touch any buttons. If you need for a steady backlight, press button(R) and button(L) at the same time, and press again for turn off.
Cancellation of Maintenance Symbol: under the One-way mode, press button(L) for 3s.
Change the wheel diameter: under the One-way mode, press button button(L) for 6s.
Low Power Warning: the battery symbol will show on screen remind you for changing batteries, if the electric decrease to 2.5V.
Power Saving Function: it will automatically enter sleep mode, if there is no operate signal for 3min.
Figure Memory Function: the internal data of bike computer can be automatically stored; it won’t miss when it is no power.
Failures and Causes
| Failures | Causes |
| Figures shown on screen satay no change during the cycling | The position or distance of magnet spoke and sensor are wrong; low battery |
| Speed shown are not right | Wrong wheel circumference |
| Slow response | Work in low temperature, it will recover working in the normal temperature |
| Black screen | Long time exposure to the sun, put it in shadows for few moments |
| Weak display | Low battery or poor battery contact; change battery |
| Miss figure on display | Take out the battery for 10s, then, put back |
Accessoriess

Sensor battery—CR2032
Common Problems
- No Speed Number on the screen:
Check if the table base is anti-loaded, the mental on mounting shoe should touch the mental on the bottom of computer.
- Different Temperature Figure:
The regular temperature difference is 1-3℃
- Speed Value Changes Frequently:
Check if the magnet spoke is target to either two sides of sensor. The frequently speed value change is always associate with the magnet spoke target to the middle of sensor.
- Manually Wake Up for the Wireless Computer:
The wireless computer needs to be wake up, but the cable computer can auto-wake up.
- Figures keep no change:
Check if the battery of sensor is well installed.
- Meaning of “+” and “–” on screen:
“+” means your speed is quicker than the average speed; “-” means your speed is slower than the average speed.
- Speed Value Faster or Slower:
Check the setting, usually it is related to the wrong wheel circumference or measurement unit setting.
- Not Applicable:
The bike computer is not applicable for motorbike or vehicle.
- Figure Missing:
The internal data of bike computer can be automatically stored; it won’t miss when it is no power.
- Buttons not work:
Slow down the press speed, it cannot react as fast as your smart phone.
- Installation Position:
It can be only installed on the front wheel.
- Figure Missing on display:
Check the battery; see if it is low power.


Reviews
There are no reviews yet.